12 Tips To Relieve Arthritis Pain In Your Hands
12 Tips to Relieve Arthritis Pain in Your Hands
Arthritis sufferers know the nastiness of finger, hand and wrist pain. It’s no fun.
Psoriatic arthritis settled into my hands after the birth of my first child and while it’s controlled now and my hands are stable, the damage makes simple daily tasks into challenges – buttoning, zipping, turning doorknobs, writing with a pen, cooking, seatbelts and buckles (buckling my child into his car seat was always impossible), clicking in my own seatbelt, brushing hair and teeth; opening jars, caps and bottles — while these tasks are easier without active inflammation, they are still challenging.
If you feel me, if your reality is painful, frustrating and incredibly humbling too, then stick with me as we work through 12 things that can make your life with arthritic hands much easier.
Medical options for arthritis exist but are not always effective long term and also come with side effects that may not thrill you. While pain meds, anti-inflammatories, steroids, biologics and even surgery are all things to discuss with your doctor, there are alternatives to explore.
I’ve split these 12 methods up into 6 exercises and 6 remedies. Give them a try and post your experiences or add your favorite tips in the comments below!
Exercises
These 6 hand and wrist exercises are easy, anytime/anywhere ways to help improve joint flexibility, function and range of motion. Do them DAILY and be diligent – joints that move stay in the groove.
- Palm Stretch and Finger Touch. With your palm facing up and your hand relaxed, spread out your fingers and stretch them away from the palm. Starting with your pointer finger, try some touches – touch the tip of your thumb to your pointer, then middle, ring finger and pinky. You can mirror this on both hands or start with one hand and continue with the other.
- Open And Close. Begin this exercise with your palms up. Gently stretch your fingers out and away from your palm and then bring your fingers together and in towards the palm. Depending on your flexibility, this may make a fist. If your fingers are not able to bend into a fist, your goal is simply to stretch out/open and squeeze in. If that’s too much, start with the stretch out and release; your fingers should naturally come in a bit.
- Thumbs Up! Face both palms up and on your lap or resting on a pillow. Start by stretching your thumbs out and then work to get them over toward the pinky. As you make this move, it’s okay for the pinky to squeeze in towards the thumb. Your goal is to stretch each thumb, hold for a moment, release and repeat 5 times.
- Flat Raises. Start with your palms down, flat on a table in front of you. Your focus is going to be on one finger at a time, so keep all other fingers flat against the table. Beginning with your thumbs, lift up off the table, hold for a breath and release. Move on to your pointers, middles, rings and pinky’s. Remember, lift, hold, release. Repeat with each finger one or two more times.
- Have A Ball. Find a palm size ball, orange or even rolled up sock. Hold it in the palm of your hand and work to squeeze your fingers up around it. Try to curl your hand up toward your elbow to get in a bit of wrist stretching too! Repeat this a few times and then switch to your other hand. Try different sizes, weights and textures. Tip: If your hands lack the strength to hold the item or if you want a variation, try setting the item on a table in front of you. Set your palm on top of the ball and allow your fingers to settle over it. From this position, work to grip and even lift the ball off the table a bit by raising your wrist.
- Paint Your Palm. Place your hands together, palm to palm. For comfort, rest your elbows on a table or pillow. Keep your left hand still while sliding your right hand down the fingers, palm and wrist of your left hand. When you get to the wrist, imagine your right hand is a paintbrush and pivot so that the top of your right-hand contacts your left wrist. Your fingers are the bristles, so use them to paint back up your palm until they meet the tips of the fingers on your left hand. Switch to your downstroke, palm to palm, left hand steady and fingers of your right-hand painting down; pivot and allow the right wrist to lead your right hand back up. Repeat 5 times and switch hands.
Remedies
These 6 remedies combat pain and inflammation from different angles. Because no two bodies are alike, it’s worth it to try coming at your arthritis in a variety of ways. Check with your doctor before trying anything, especially if you take medication.
- Juice. These 2 juice blends have been part of my anti-inflammatory tool kit for years! In moderation, juicing can be a wonderful way to speed the absorption of antioxidants, vitamins and minerals. Because juice lacks fiber, it can spike blood sugar – so be mindful of that if blood sugar balance is an issue for you. Using a smaller amount and/or having your juice with a fiber-rich snack can help reduce the glycemic impact.
Cherry Bomb: Mix 16 ounces of unsweetened, pure Tart Cherry Juice with 16 ounces of fresh brewed, unsweetened Green Tea. Drink 1 cup of this throughout the day and sneak in another 5-6 cups of fresh water to meet your hydration needs while combating pain and inflammation. Store in the fridge and use within a week.Clean Green Juice: If you have a juicer, juice 4 stalks of celery, 2 cucumbers and 1 green apple. This enzyme juice packs in vitamins A and C as well as the minerals calcium, iodine, iron, magnesium, phosphorus, potassium, silicon and sodium. There are 2 components in celery that are particularly helpful for inflammation: polyacetylene and luteolin. Luteolin prevents activation of a pathway in the brain that turns on inflammation; it also inhibits production of excess TNF-alpha (which is a direct cause of inflammation!).
- Ginger. Ginger has antioxidant and anti-inflammatory properties that help reduce arthritis pain and inflammation. While it’s easy to add fresh or powdered ginger to your food, it’s even easier to just make ginger tea! I buy a big “hand” of ginger, peel it and make a liter or 2 of this ginger tea. It is lovely hot or cold. For your morning cup, add a tablespoon of raw honey and half a teaspoon of cinnamon to your cup for added benefits and flavor! Since cinnamon is a bit stimulating, steer clear of it at night to ensure you get good sleep.To make a batch of ginger tea: Peel and slice some ginger. You want about 1 inch of ginger per cup of water. Simmer the water and sliced ginger for 10 minutes. Allow the mixture to sit for 5 minutes, strain and drink a cup two or three times a day until you get relief.
- Turmeric. This antioxidant and anti-inflammatory powerhouse is a must-try. Easily incorporate turmeric into your diet by adding dried or fresh turmeric to soups or smoothies. My favorite bedtime golden milk recipe can be found here.
- Epsom Salt. Epsom salt is rich in magnesium and known to help reduce the inflammation, pain and stiffness from arthritis and associated nerve pain as well. Magnesium is also important for bone mineralization, which is a factor in arthritis.My go-to use: Mix two cups of Epsom salt in warm bath water. Soak your hands in the solution for 20 to 30 minutes. Do this daily for acute pain and as needed once pain subsides.
- Icy Hot. Pain is such an individual thing that it’s worth trying a variety of methods to see what brings relief. Ice and heat are both known for helping with comfort and inflammation.
Heat and cold treatment ideas:- Take a warm shower or bath to ease stiffness.
- Try a warm paraffin wax treatment for sore hand and foot joints (available at many drugstores).
- Soak in a warm whirlpool.
- Use a heating pad, hot water bottle or microwavable corn-bag (protect skin with a cloth buffer) for up to 20 minutes at a time. Air-activated heat packs are great for heat treatment on-the-go.
- Check out Infrared Light Therapy wands for spot treatment of joints or see if you can schedule a session in a Full Spectrum Infrared Sauna for overall pain relief.
I use a Sunlighten mPulse sauna daily — this is hands-down the best investment I’ve made for my overall health, but specifically for my arthritis! - Try a photo biomodulation session.
- Wrap a bag of ice or frozen peas in a towel so you protect your skin; apply to painful areas up to 20 minutes at a time.
- Try a store-bought gel pack. These chill in the freezer in a matter of hours, are flexible and easy to mold around sore joints and last indefinitely.
- Opt for an ice bath. Add cold water and ice to a container large enough to submerge your hand. Have a nice fluffy towel nearby. Dip your hand or painful joints into the ice bath for 30-60 seconds, then remove and wrap in the towel. You can repeat this a few times. Use your best judgment so you don’t overexpose your skin to the cold. The Wim Hof method has gained popularity in the last few years as well – this is a whole body cryo experience where you submerge into an ice bath; one benefit is supposedly to help stimulate the immune system.
- Try cryotherapy in a full body cryo chamber or with a targeted cryo wand. This is a dry cold and tends to be easier to tolerate than ice water. The benefits for reducing inflammation and controlling pain can be profound.
- Castor Oil. The pain-relieving properties of castor oil can be a huge benefit for arthritic hands!
The easiest way to try castor oil is to rub a tablespoon or two into your fingers and joints on one hand. Once you’ve worked it in, wrap that hand in a soft flannel cloth or clean towel. Castor oil is thick and messy, so consider setting aside a specific towel that you can reuse for this purpose only. Gentle heat can help the castor oil penetrate the skin while also providing comfort and relief. To try this, you can set a heating pad, warm corn-bag or hot water bottle on the table in front of you or on your lap and then rest your wrapped hand on top. After 10-15 minutes, switch hands. You can simply rub the oil into your skin and wipe off any excess with the cloth.This is a great hexane free castor oil: https://amzn.to/3p1FcxO
Pregnancy note: DO NOT use castor oil without consulting first with your OB/GYN or midwife!
I hope that you find something among these 12 Tips to Relieve Arthritis Pain in Your Hands that helps you!

 Place 1/4 inch thick slices of zucchini on a large baking sheet. Brush each lightly with olive oil. Layer with thinly sliced tomato. Sprinkle with dairy-free cheese shreds (or your favorite mozzarella). Scatter chopped veggies (onion, bell pepper, mushroom, olive). Broil 5-7 minutes or until top is hot, edges crispy, cheese melted. Remove from oven, top with arugula. Note: slice zucchini in rounds for pizza circles or lengthwise for a flatbread feel. Alternatively, slice zucchini in half lengthwise and scoop out the seedy bits. Then stuff the hollow with your pizza ingredients and broil to warm through.
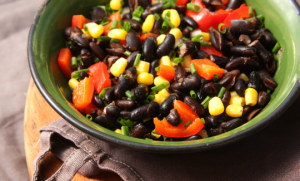
 Toss 2 cups pre-sliced mushrooms in a large skillet, season with salt, pepper, cumin, and oregano to taste. Add 28 oz. diced tomatoes (with their liquid) + 1 cup chunky Salsa + 1 can steamed lentils or black beans (rinsed, drained). Stir in 10 oz. frozen corn + 1 cup sliced zucchini or bell pepper. Reduce heat to medium-low and simmer for 8 minutes. Serve with a generous amount of minced cilantro or parsley. Note: Easily turn this into a delicious soup by adding a carton of organic broth — a cup of cooked quinoa and a handful of chopped spinach or kale makes this a hearty and nutritious soup.
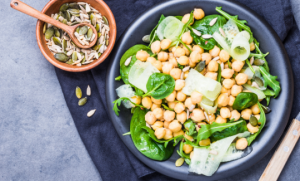
 Drain 1 can (28 oz) garbanzo beans/chickpeas (reserve liquid for another use). Toss the chickpeas in a large bowl with the juice of 1 lemon, salt and pepper to taste, 2 Tablespoons olive oil, 1 clove of garlic (peeled and minced). Mix ingredients together and adjust seasoning if needed. Serve on a bed of mixed greens. Sprinkle the top with 2-3 Tablespoons of hemp seeds.
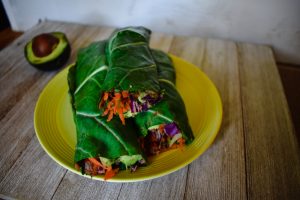
  Wash 1-2 leaves of purple or green cabbage or swiss chard (per serving). Slice out the thick part of the stem if needed. Mash the flesh of 1/2 an avocado per serving — season with salt, pepper, garlic, lemon or lime juice. Lay out the cabbage leaves and spread some avo mash on each one. Top with sliced baked tofu, tempeh or roasted chicken or salmon (or your favorite clean protein). Add a slice of pickle or fresh cucumber and roll the contents up in the leaf. Eat! Note: prepared hummus can be used in place or mashed avocado or in addition to it! Broccoli slaw mix is another great filler.
 Cook soba noodles in boiling water for 8 minutes — or soak thin rice noodles in hot water until pliable — drain and set aside. Meantime, whisk together 2 Tablespoons each miso paste, lime juice, water, sriracha (optional). Put cooked noodles in serving bowls. Add shredded carrots, sliced cucumber, grape tomatoes, snap peas. Add cubes of cooked protein like tofu, tempeh, chicken, fish, beef, etc if desired. Top with a drizzle of the dressing and fresh minced cilantro, green onion, jalapeno or sprouts if desired. Note: A little natural peanut/almond or sunflower butter added to the dressing can make for a delightful Thai inspired flavor. Some minced ginger or ginger juice also tastes nice.